 iphone-release.com
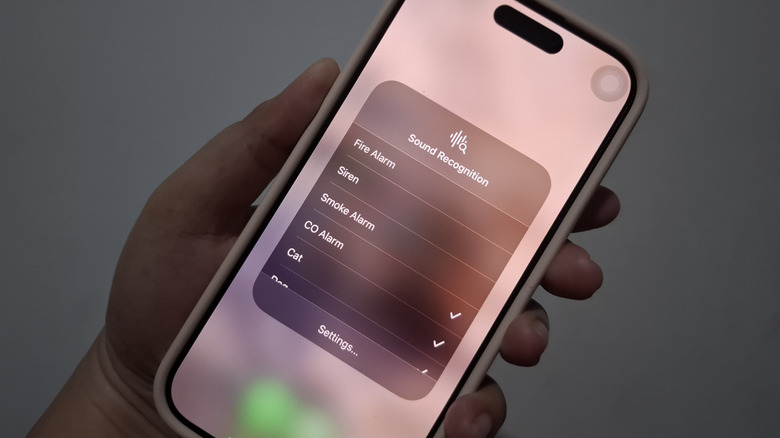
How many times have you left your friend waiting outside because you missed the doorbell? Or how often have you unintentionally ignored your cat because you didn’t hear its meows? If these scenarios happen more frequently than you prefer, then you’d want to start using Sound Recognition on your iPhone.
Sound Recognition was first introduced in iOS 14 as one of the iPhone features for hearing-impaired users. What it does is actively listen for specific sounds, such as smoke alarms, door knocks, and baby cries, among others. Once such sounds are detected, it sends a notification to your iPhone to let you know. This helps you become more aware of your environment and prevents you from missing important alarms or events happening around you. While it’s originally designed for individuals with difficulty hearing, able-bodied people can also find the feature handy when they’re preoccupied with something else — maybe writing up work reports or cleaning the kitchen sink — or when they just want an extra ear to listen to particular sounds in the environment. But how exactly do you set up and use Sound Recognition?
Setting up Sound Recognition on your iPhone
To activate Sound Recognition on your iPhone, here’s what you need to do:
- Launch the Settings app.
- Open Accessibility.
- Under Hearing, select Sound Recognition.
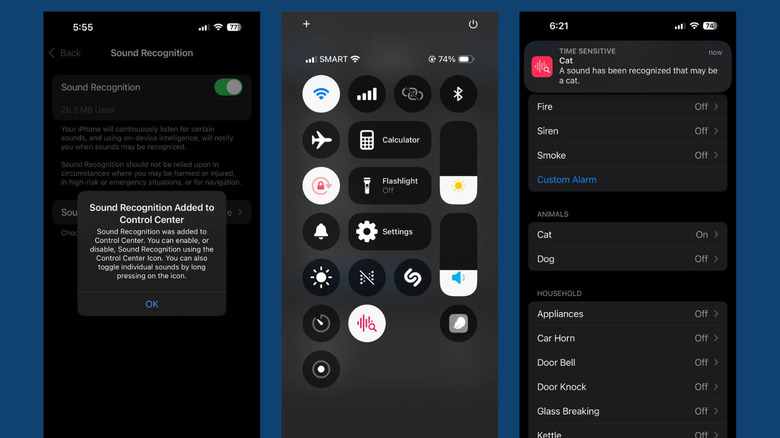
- Toggle on Sound Recognition. It should automatically be added to your Control Center.
- Tap OK on the popup that appears.
- Go to Sounds.
- Choose the specific sound you want Sound Recognition to keep a lookout for.
- Tap on the toggle to turn the sound on.
- Press Allow on the popup to get notified when Sound Recognition picks up that particular sound.
- (Optional) To change the notification tone for that sound, select Alert Tones and pick a different tone from the options.
- (Optional) To set the haptics for that sound, open Alert Tones and choose Haptics. Then, select from the available options or tap Create New Vibration to make a custom haptic.
- Turn on all the other sounds you want to be notified about.
- Open the Control Center by swiping down from the upper right corner of the screen.
- Make sure Sound Recognition (sound wave icon with a magnifying glass) is highlighted in red, meaning it’s turned on. Otherwise, press the icon to activate it.
With this iPhone accessibility feature enabled, you should now start receiving notifications every time your device detects one of the sounds you’ve selected. The notifications will pop up just like any other alerts do and tell you what specific sound it recognized. To turn off Sound Recognition, go to your Control Center and tap on the icon. To add a new sound without going through Settings, long-press on Sound Recognition in the Control Center and check the new sounds you want your iPhone to detect, too.
Adding custom alarm, doorbell, or appliance sounds
While Sound Recognition already comes with a host of preset sounds you can choose from, you may be using alarms, doorbells, and appliances with their own unique sounds. But here’s an iPhone tip you should know — Sound Recognition can still detect those sounds as long as you add them to the list. Follow these steps to do so:
- Go to Settings.
- Choose Accessibility.
- Tap on Sound Recognition under Hearing.
- Press Sounds.
- To add a new alarm sound, select Custom Alarm under Alarms.
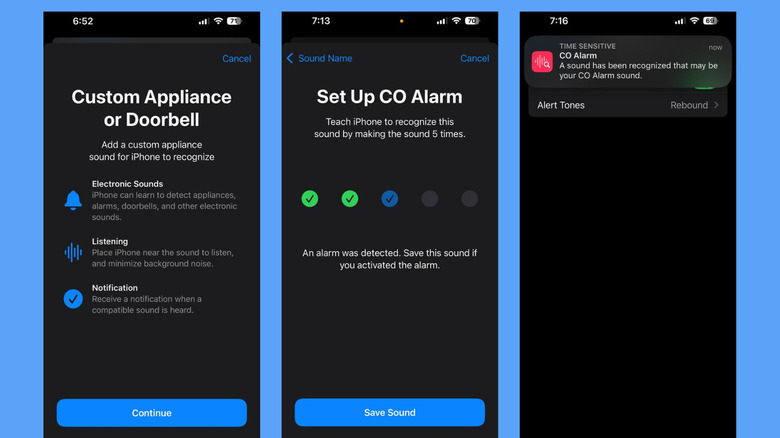
- To add a new doorbell or appliance sound, choose Custom Appliance or Doorbell under Household.
- Hit Continue.
- Type a name for your custom sound.
- Press Continue.
- Get your alarm, doorbell, or appliance ready.
- Tap on Start Listening to let your iPhone hear and learn the sound.
- Have your alarm, doorbell, or appliance play the specific sound. It’s best if there are no other prominent sounds playing in the background, as your iPhone might pick these up instead.
- Once the sound is finished, press Save Sound.
- Tap on Start Listening again.
- Play the specific sound again.
- Hit the Save Sound button.
- Repeat the process until you have a total of five saved sounds.
- Press Done to exit.
From here, your iPhone will use the saved sounds for training, which usually takes a couple of minutes. Once that’s complete, you’ll get a notification saying your new sound is good to go. Just like the preset sounds, you can also opt to set a different alert tone for your custom sound. To test if Sound Recognition would detect the new sound, simply activate the feature and play the alarm, doorbell, or appliance sound again. A notification about the sound should pop up on your screen.
Source: http://www.slashgear.com/1751944/iphone-sound-recognition-what-it-is-how-use/
You may also like

